Tools and equipment software management helps shop manage their business operations better and make create a profit center.
Step 1: Configure a rental category in your rental tool software
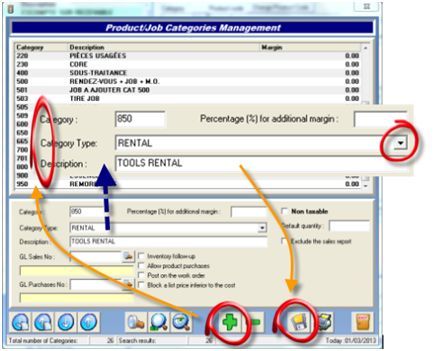
- In the inventory window, click on the magnifying glass to the right of the category to open the category management tool.
- Click on the “+” to add a category.
- Enter a category number: e.g. 650.
- In the category type scroll menu, select “Rental”.
- Add a description: e.g. Tool rental
- Save.

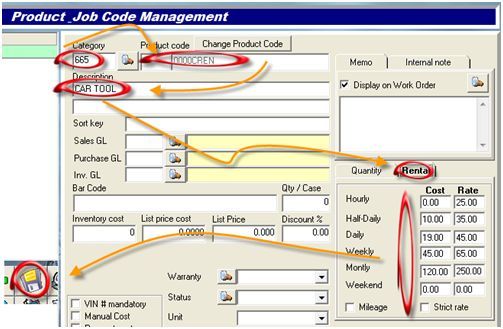
- Click on the “+” to add a product.
- Enter the category number: e.g. 650.
- Generate a unique product code: e.g. CREN.
- Add a description: e.g. Tool rental
- Complete the rental price list in the “Rental” tab.
- Save.

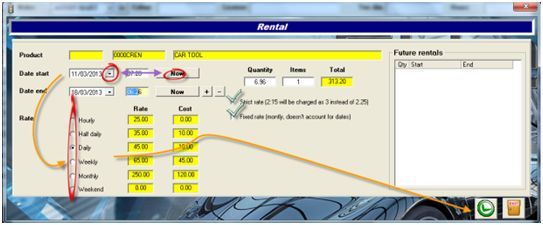
- Open an estimate.
- Add the rental product code: e.g. CREN. ( Ex Care Rental )
- In the rental window, next to the “start date”, click the “Now” button.
- Click on the door to exit.
- Open the same estimate.
- Click on the line with the rental product code: e.g. CREN.
- In the rental window, next to “end date”, click the “Now” button.
- If needed, select the options in the check boxes.
- Click on the green button.


 Click here to ask for a free demo


