

 Click here to ask for a free demo


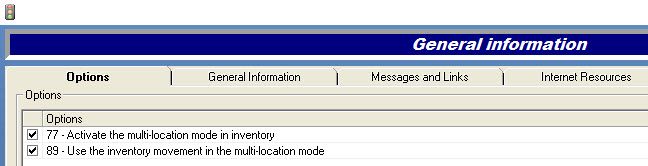
{fa-warning} Configuration options for multi-localisation
{fa-warning} Added features in multi-localisation
Click on the tab to discover the differences between multi-localisation and a single location
Key features :
The multi location allow every location to bill customer directly while regrouping receivable account for every customer,
- Every location can have a different invoice,
- Shared vehicle history,
- Sales report by location,
- Local inventory with transit request,
- Inventory value and reporting per location,
Configuration
- Checkmark option 77 and 89,
- In order to activate option 77, you need a license that activates the multi-location module
- When option 89 is checked (recommended option), the user will be forced to leave use a transaction module to edit quantity. For security and audit, this option to manage transaction should be activated.
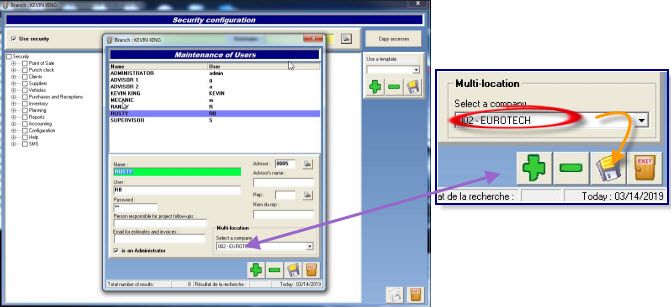
For every user, a company must be selected. Note that a user can only be in one company to reduce the risk of error in the operation.
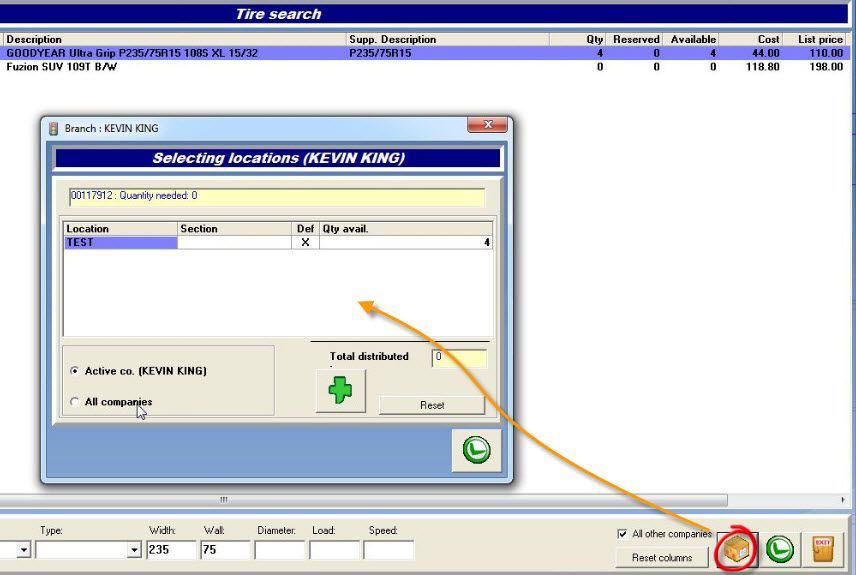
To search in other location
- Do a regular search by description, when the results are shown,
- Click the option at the bottom right,
- Scroll to the right to see the value in the column: ”other”,
- Click on the icon box to see the detail of the locations offering quantities.
To view the location for one item in one location:
- Click on the icon with the box,
- Select “Active Co”.
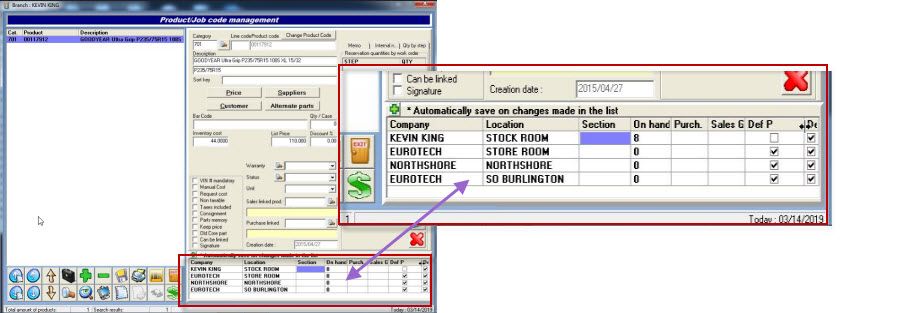
In the multi-location,
- There are no limitations in the numbers of localization within a company
- Dep P : default location to place the inventory you have purchased,
- Dep S: default location the system will take the inventory when an item is sold,
- GL by location can be set for purchase,
- Click on the “+” to enlarge the grid box,
To add a new location:
- Go to the inventory module and select “Manage location”.
To move an item from a location to another in the same location
- Click on the icon with the "paper list", below the "SAVE" icon,
- Click on the icon with the “Pen”
- Make all adjustments
To search in other location
- Click the option at the bottom right,
- Scroll to the right to see the value in the column:”other”.
- Click on the icon box to see the detail of the locations offering quantities
Request for a transfer
- Insert the quantities to transfer in the grid,
- Click on the green icon to request a transfer.
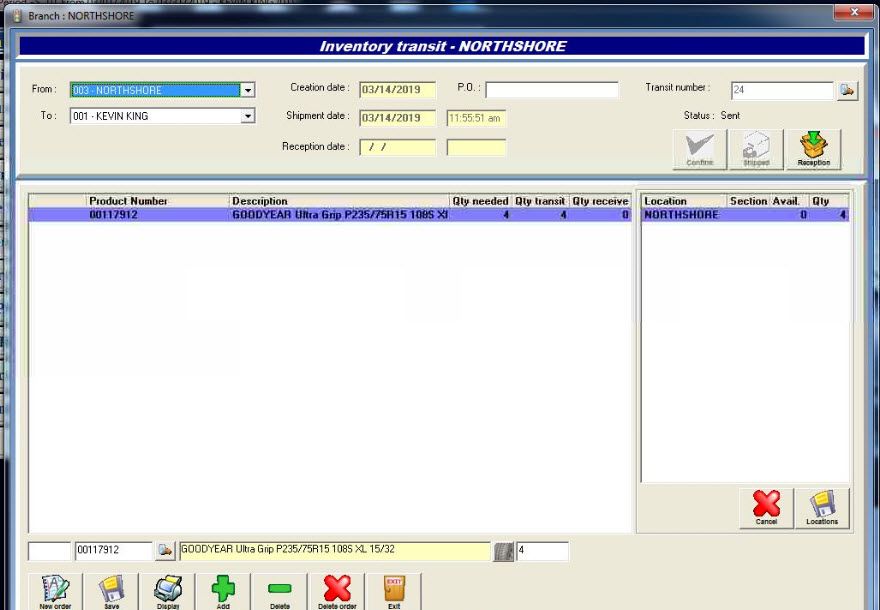
- Go to Inventory/Transit,
- Click on the spyglass icon,
- Select the transfer,
- Use the search option field at the bottom: "To validate ".
- Double click in the grid,
- Approving the transfer by clicking the approved icon.
- Use the search option field at the bottom: "Processing".
- Double click in the grid to select the transfer to ship,
- Print the "Shipping Order",
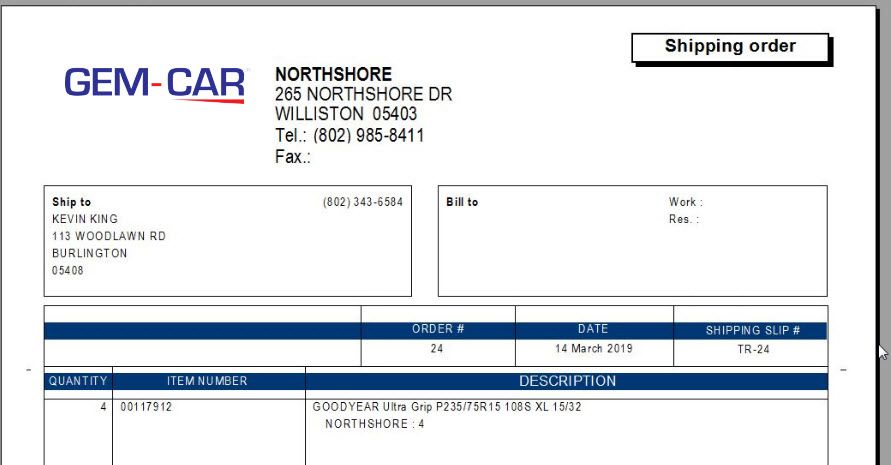
- Click on the shipping icon,
- Confirmed
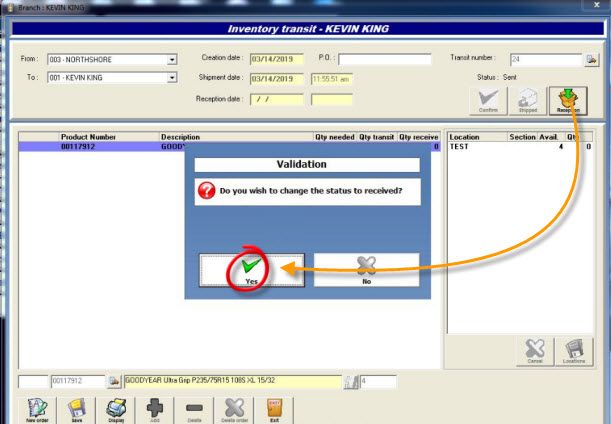
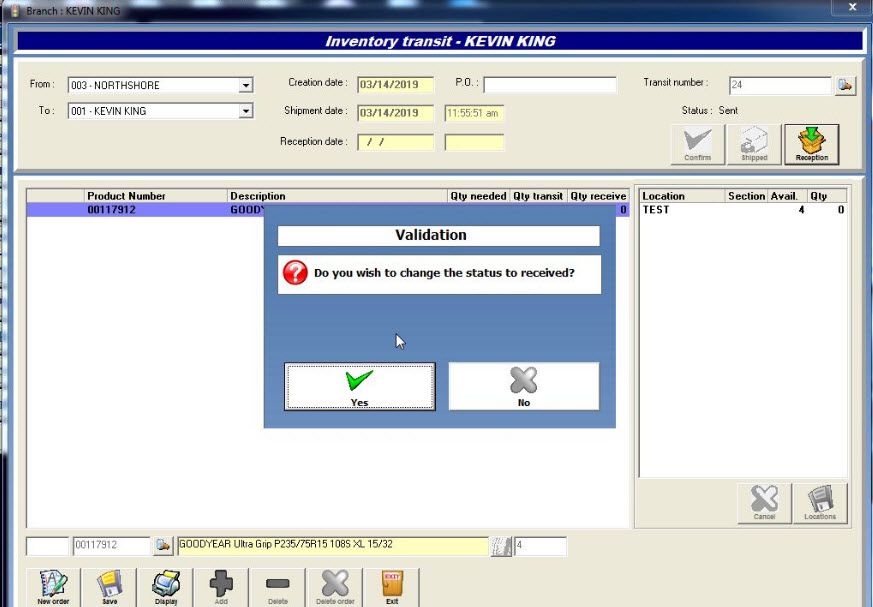
- Go to Inventory/Transit,
- Click on the spyglass icon,
- Select a reception
- Select a line,
- Edit the quantities at the bottom,
- SAVE.
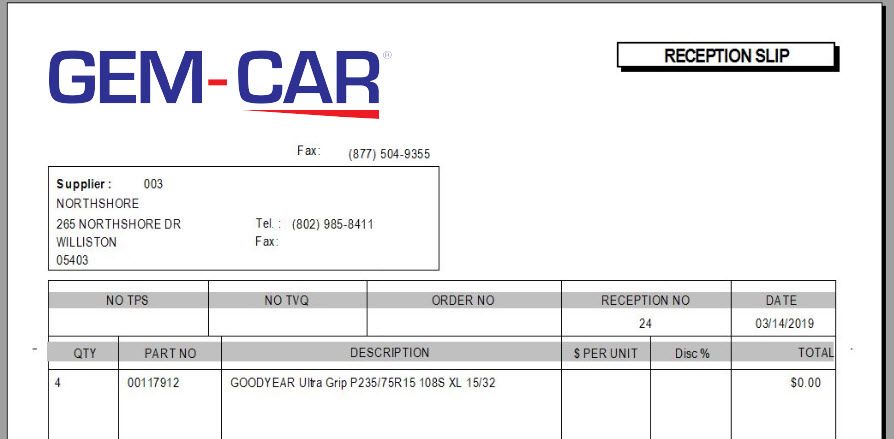
- Confirm reception
- Print reception slip: bottom left icon,
Most report allows the user to select the company for which you wish to view the report
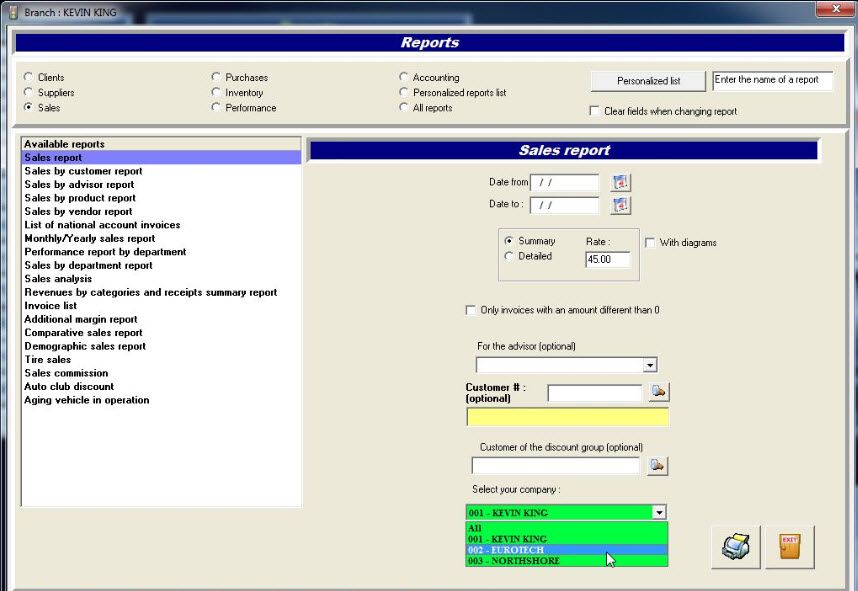
In the multi-locations mode, a company needs to be selected first. See the procedure to manage physical inventory.


