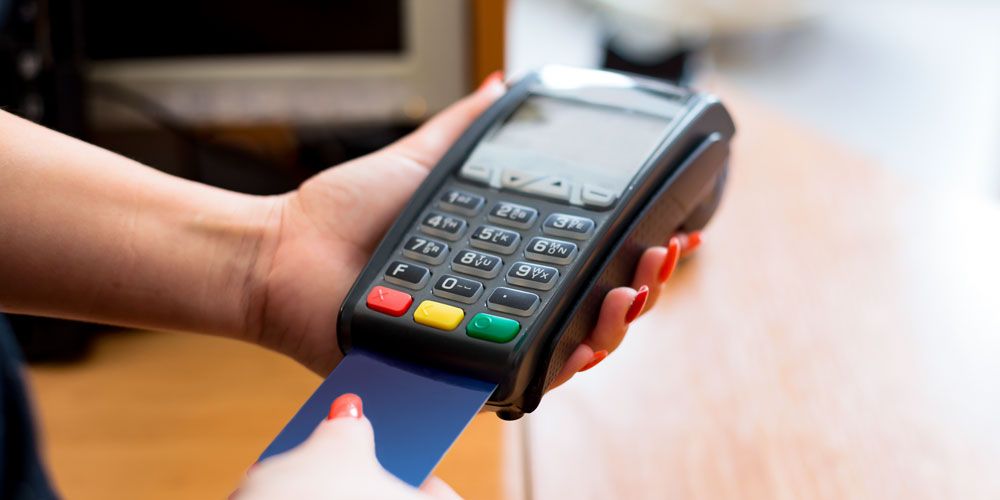
 The card processing terminal simplifies the card payment. It automatically sends the card type used to pay to GEM-CAR (e.g.: Debit, VISA, Master Card, etc....), reducing the risk of errors.
Furthermore, this service is offered to you at competitive rates. For any question, contact us at {fa-phone-square } 1-866-848-8282.
Our terminals are shipped pre-configured. Only a few steps will be required to set it up in GEM-CAR:
- Connect a network cable (for internet access) and power to the terminal,
- Turn it on by pressing the {fa-power-off } button above the [1] key,
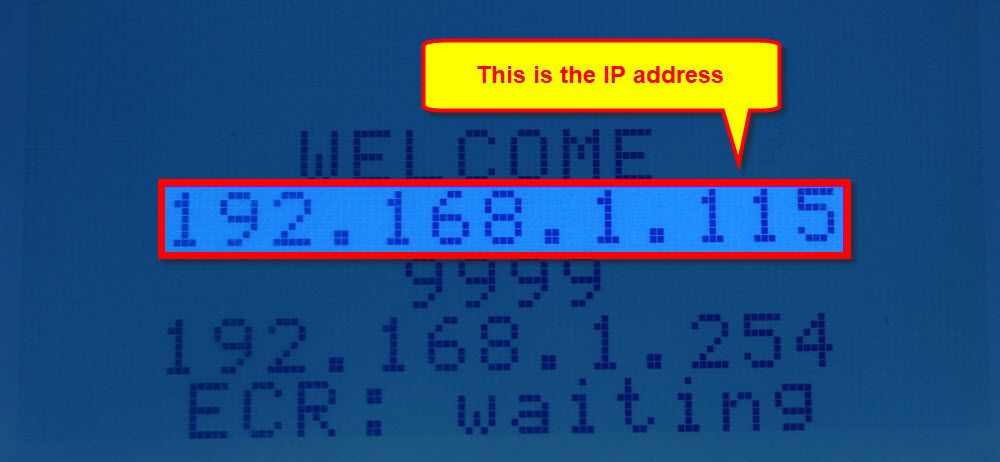
- Press the yellow [{fa-long-arrow-left }] button to activate the "Listening" mode and write down the IP address displayed on the screen.
- If you miss the IP address, press the red button,
- Enter the 6-digit code "000000" and press again the yellow button.
From the main menu, go to Configuration > Local configuration:
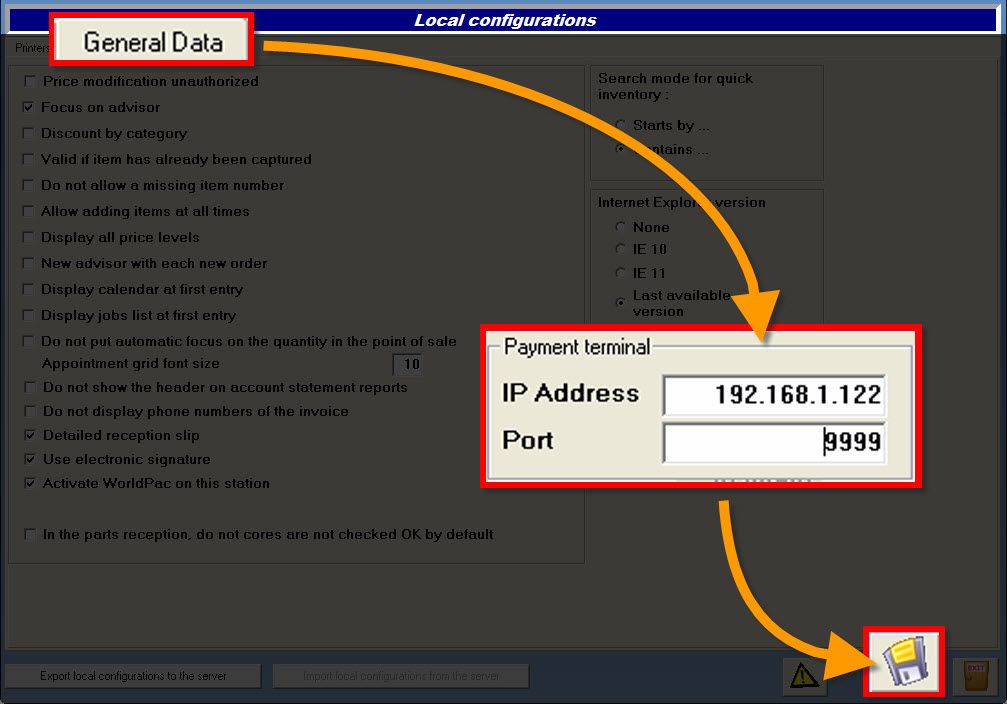
- Go to the "General data" tab,
- Go to the last section on the right "Payment Terminal",
- In the "IP Address" field, enter the IP of the terminal,
- In the "Port" field, enter "9999",
- Click the disk {fa-save} to save,
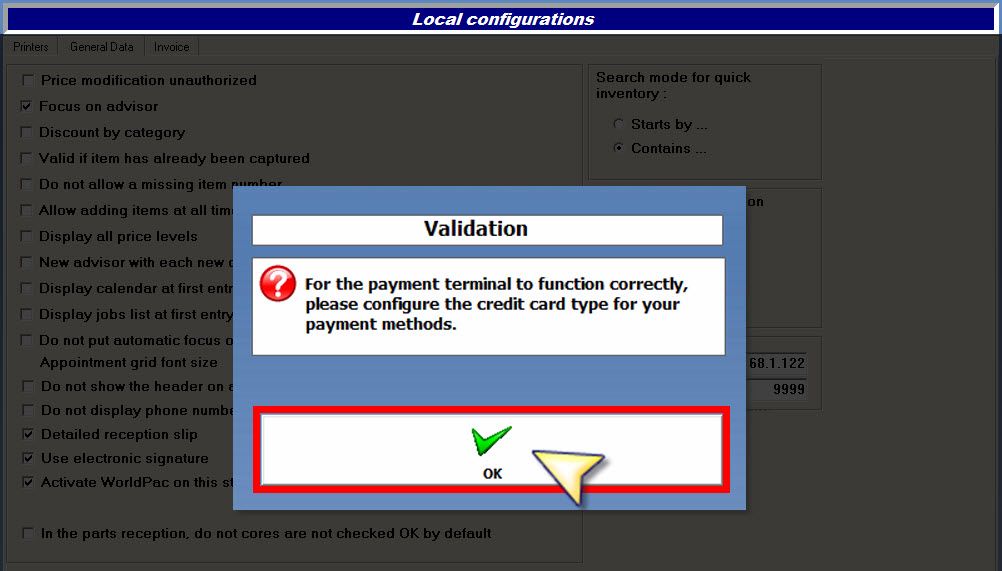
the first time, GEM-CAR will ask you to setup the "Card type" of your payment methods that require a card. Make sure to setup all the ones that require a card so you don't see that prompt again in the future.
- Click "OK" to continue,
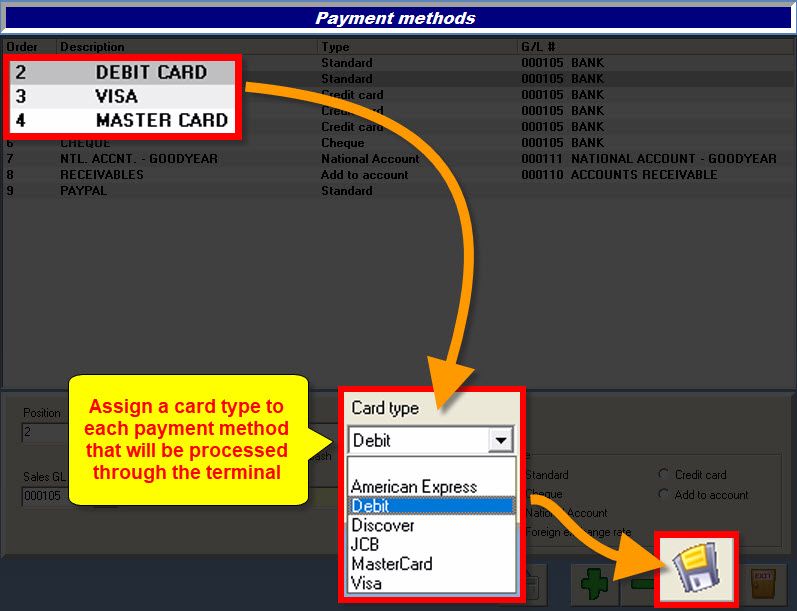
- In the top section, select a card-based payment method,
- In the bottom section, select the "Card type" that corresponds with payment method selected above,
- Click the disk {fa-save} to save,
- Repeat these steps for each card-based payment method.
At the payment window "Receive payment"...
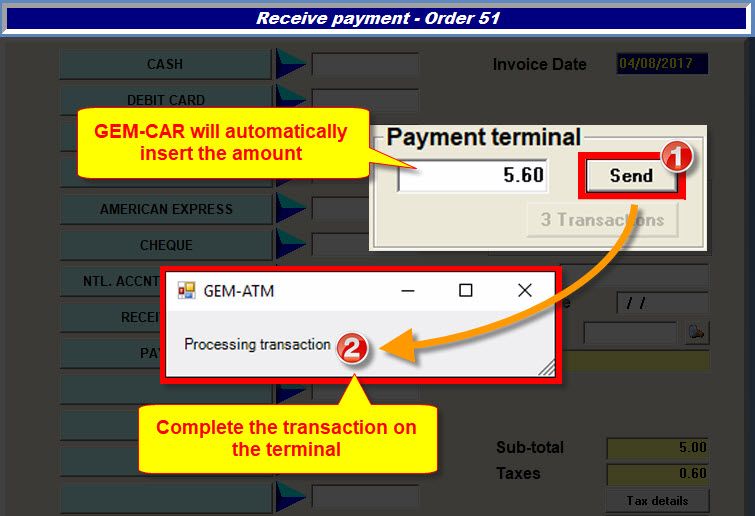
- (1) In the right section "Payment terminal", GEM-CAR will automatically insert the invoice amount,
- (2) Click the "Send" button to send the amount to the terminal,
- (3) GEM-CAR will wait for the terminal to process the payment,
- On the terminal, complete the transaction with your customer,
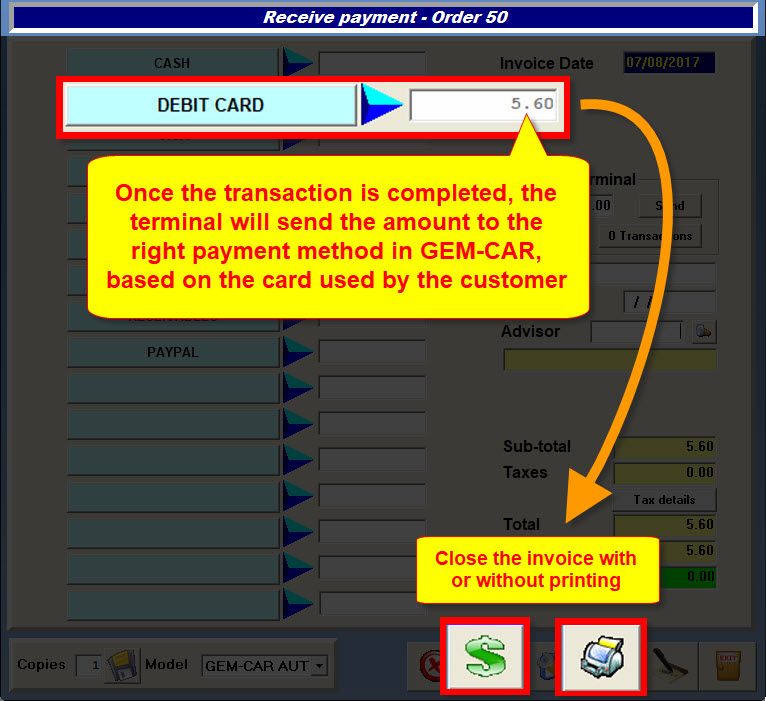
- Once the transaction is completed on the terminal, GEM-CAR will automatically put the amount received in the right payment method based on the card type used by the customer,
- Close the invoice in GEM-CAR with or without printing.
You can see a list of all the transactions from the "Receive payment" window...
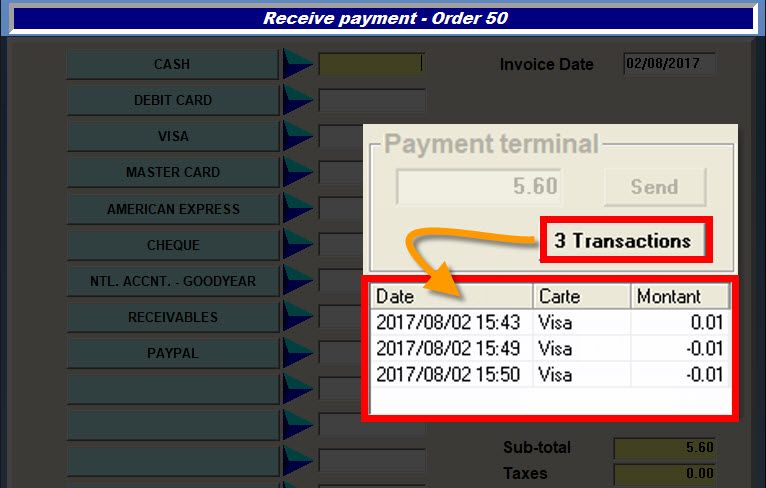
- Click the "x transactions" button, (x = quantity of transactions),
- A section will open below and display the transactions list with the date, card type and amount.
This report will be printed from the terminal and will include a report of the transactions of the day. Follow the next steps to print it:
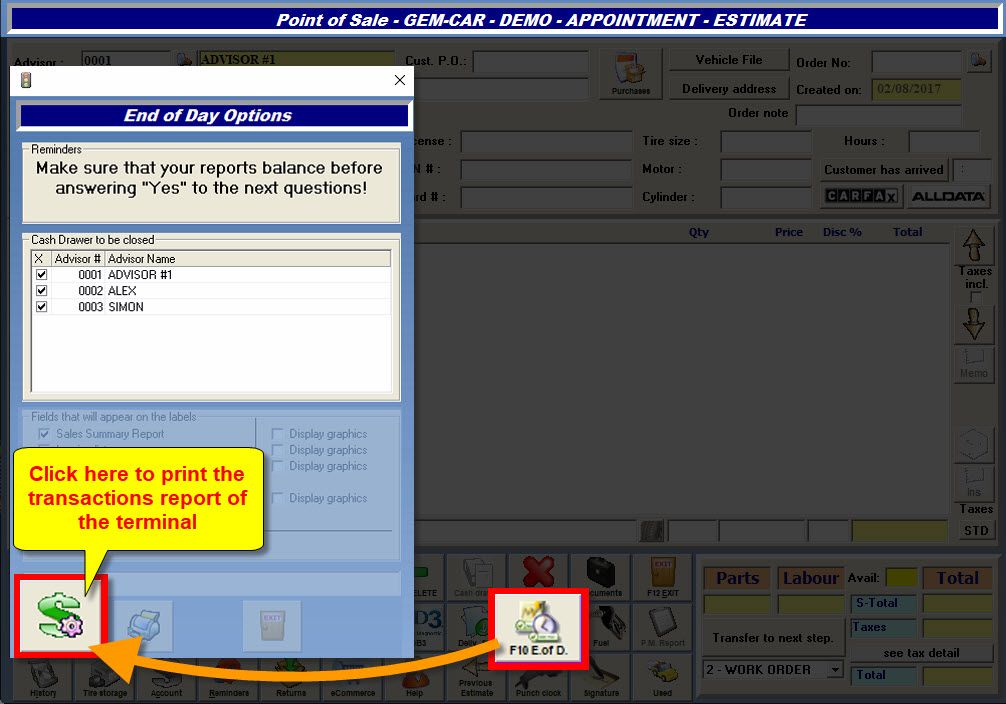
- From the Point of Sale, click the "F10 E.of D." button (or press the F10 key on your keyboard),
- At the bottom left corner of the window, click the {fa-dollar } button to print the report,
- The terminal will automatically start printing.
- From the terminal, click "Menu",
- Press "1 - Settlements",
- Type it the administrator password ("000000" by default),
- Press "OK" to go through the prompts until the batch is closed.
- From the terminal, click "Menu",
- Press "3 - Setup",
- Press "1 - Option",
- Type in the administrator password (000000 by default) and press "OK",
- Select a language by pressing the {fa-sort-up } / {fa-sort-down } arrows,
- Press "OK" to go through the prompts and apply the changes.
To activate and access your account for the on-line reports:
- Go to {fa-share-square-o } https://www.myclientline.net/enroll.html
- Fill the form to access your account.
Here are the reference guides and the user manual from the manufacturer (in PDF):


 Click here to ask for a free demo


