

 Click here to ask for a free demo


{fa-info-circle} Available since release 10.1
{fa-warning} For a black and white model, the printer must have the black and white option, otherwise the printing will be done in color.
{fa-warning} For a two-sided model, the printer must have the option, otherwise 2 pages will be printed.
Invoices
{fa-warning} Make sure you do not already have these templates before creating them.
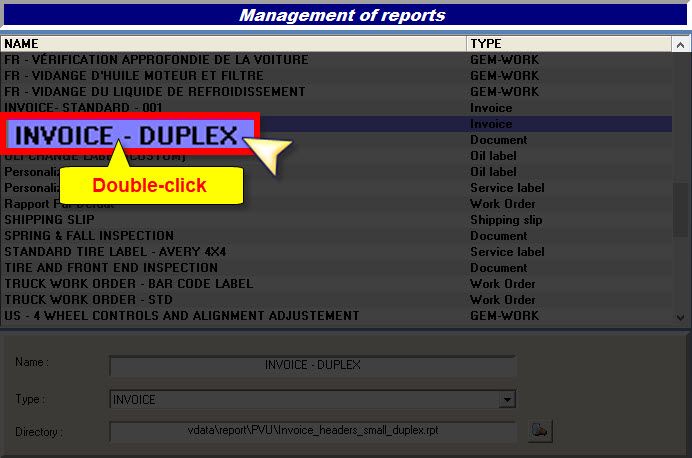
From the main menu, go to [Reports]> [Report Management]: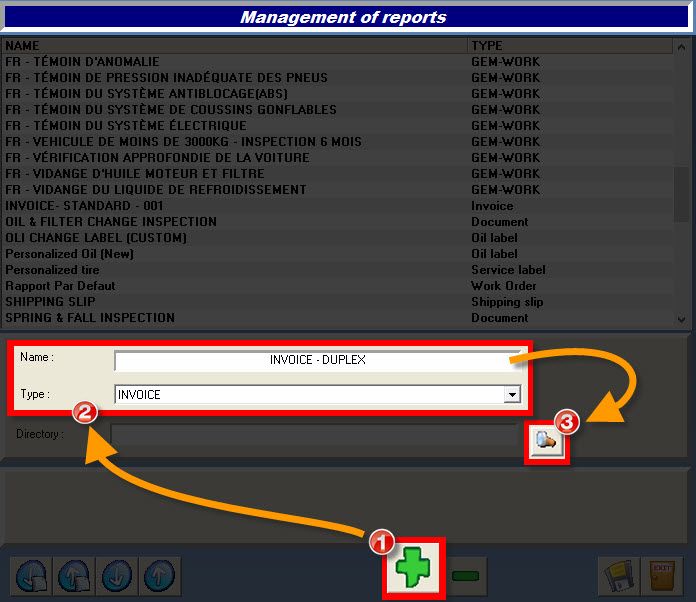
- Click the {fa-plus} to add a new model,
- Enter a Name (e.g.: INVOICE - DUPLEX),
- Select the Type: INVOICE,
- Click the spy glass {fa-search} of the Directory to select the model file,
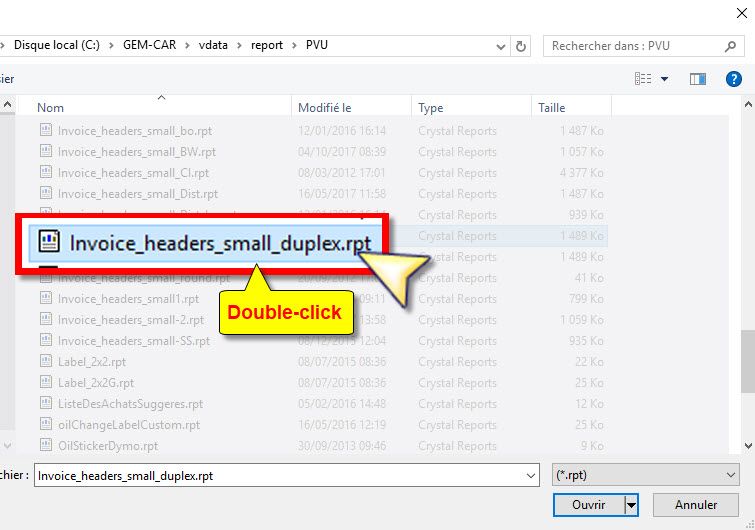
- Select the file according to your needs:
- Invoice_headers_small_duplex.rpt (duplex)
- Invoice_headers_small_BW.rpt (black and white)
- Invoice_headers_small_duplex_BW.rpt (duplex - black and white)
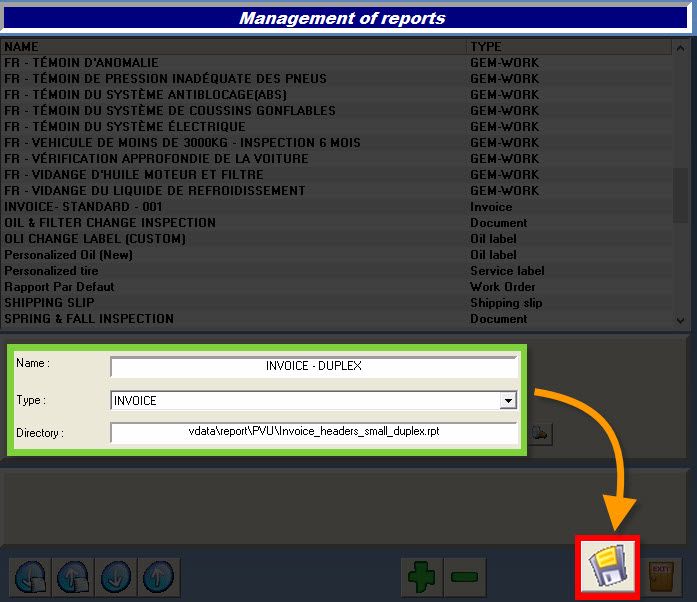
- Click the disk {fa-save} to save.
{fa-info-circle} Repeat the steps for the other invoice templates you wish to add.
From the main menu, go to [Configuration] > [Local Configuration]:
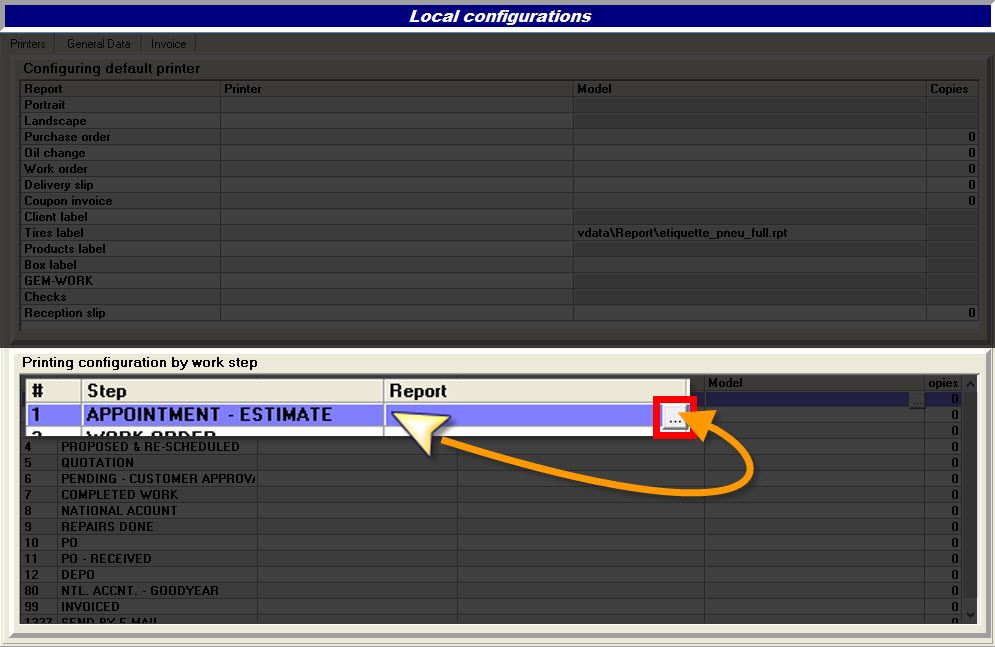
- In the lower part, select the step where you want to assign the model,
- In the "Report" column, click the [...] next to the model's name,
- Double-click the new template to assign it to the selected step,

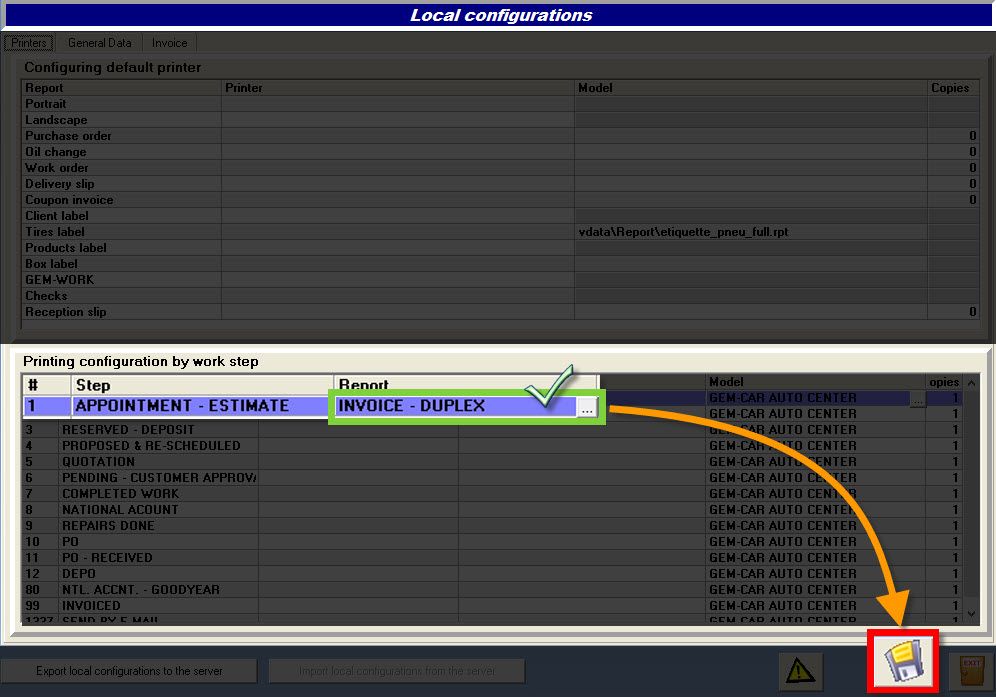
- Click the disk {fa-save} to save.
{fa-info-circle} Repeat these steps to assign the model to other work steps.
If you want to assign the report, printer, model, and number of copies of a work step (or line) to all other steps, follow the steps below:
- Select the step that has the right configuration,
- Click the yellow icon [{fa-warning}] to apply this configuration to all steps,
- Click the disk {fa-save} to save.
Work orders
{fa-warning} Make sure you do not already have these templates before creating them.
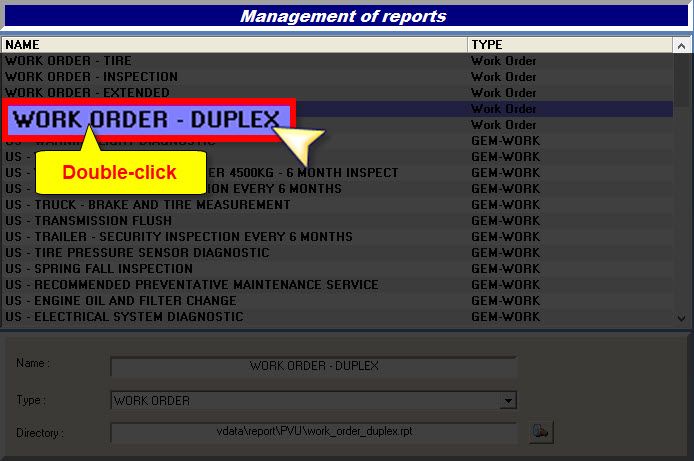
From the main menu, go to [Reports]> [Report Management]:
- Click the {fa-plus} to add a new model,
- Enter a Name (e.g.: WORK ORDER - DUPLEX),
- Select the Type: WORK ORDER,
- Click the spy glass {fa-search} of the Directory to select the model file,
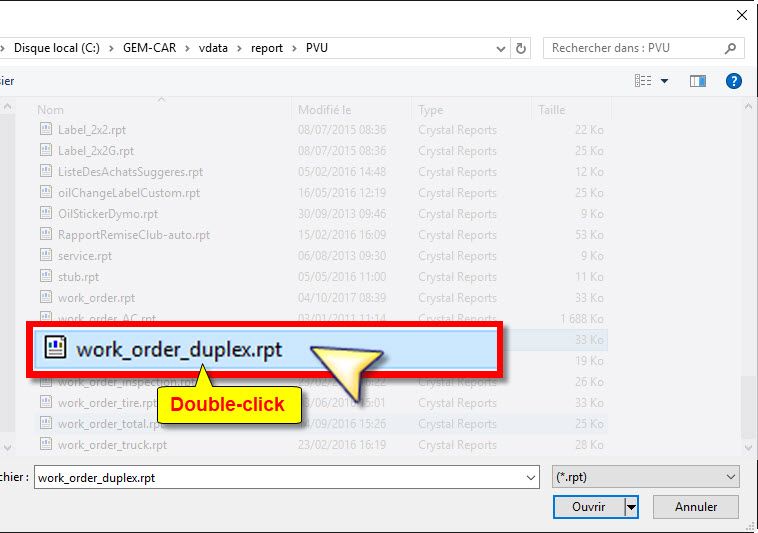
- Double-click the "work_order_duplex.rpt" file to select it,
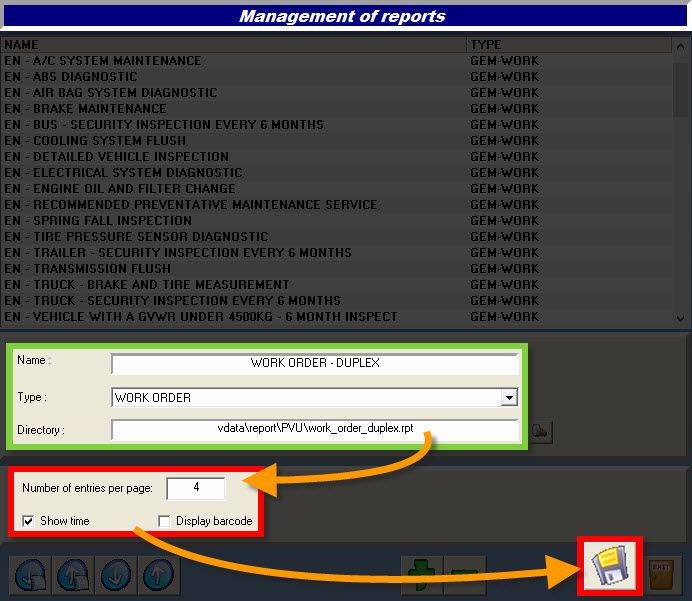
- Enter the Number of entries per page,
- Optional: select the options of the work order template:
- {fa-square-o } Show time.
- {fa-square-o } Display bar code,
- Click the disk {fa-save} to save.
From the main menu, go to [Configuration] > [Local configuration]:
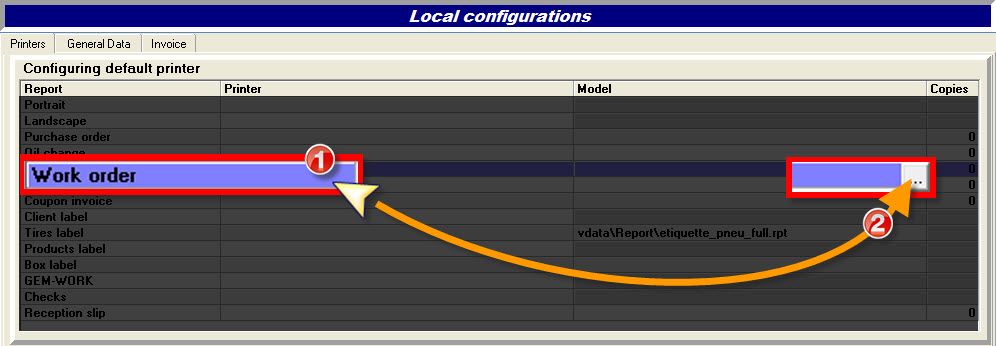
- In the top part, select the line "WORK ORDER",
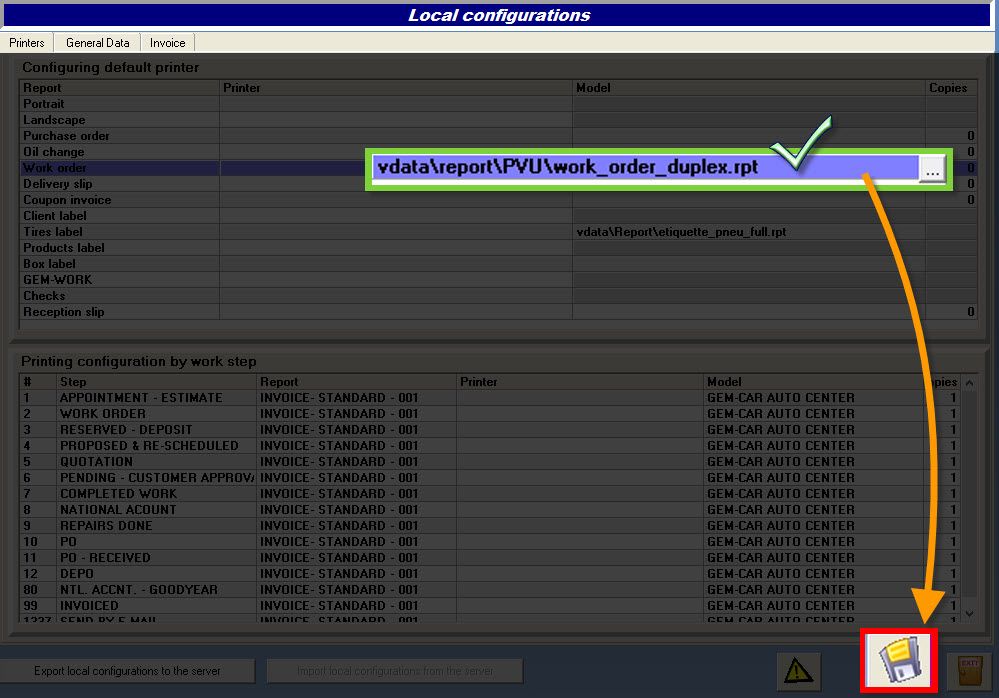
- In the "Model" column of the selected row, click [...] next to the model name (.rpt),
- Double-click the new model name to assign it,
If you want to assign this model to all labor codes in the system, follow the steps below:
- Select the step that has the right configuration,
- Click the yellow icon [{fa-warning}] to apply this configuration to all steps,
- Click the disk {fa-save} to save.
{fa-info-circle} That said, if you had labor codes configured with a specific work order model (e.g.: WORK ORDER - TRUCK or WORK ORDER - TIRE), they will be replaced by the newly created work order model, which will not necessarily be suitable for trucks or tires.
- After double-clicking the new model as mentioned above, click the {fa-save} disk to save.
From the main menu, open a work order in the Point of Sale:
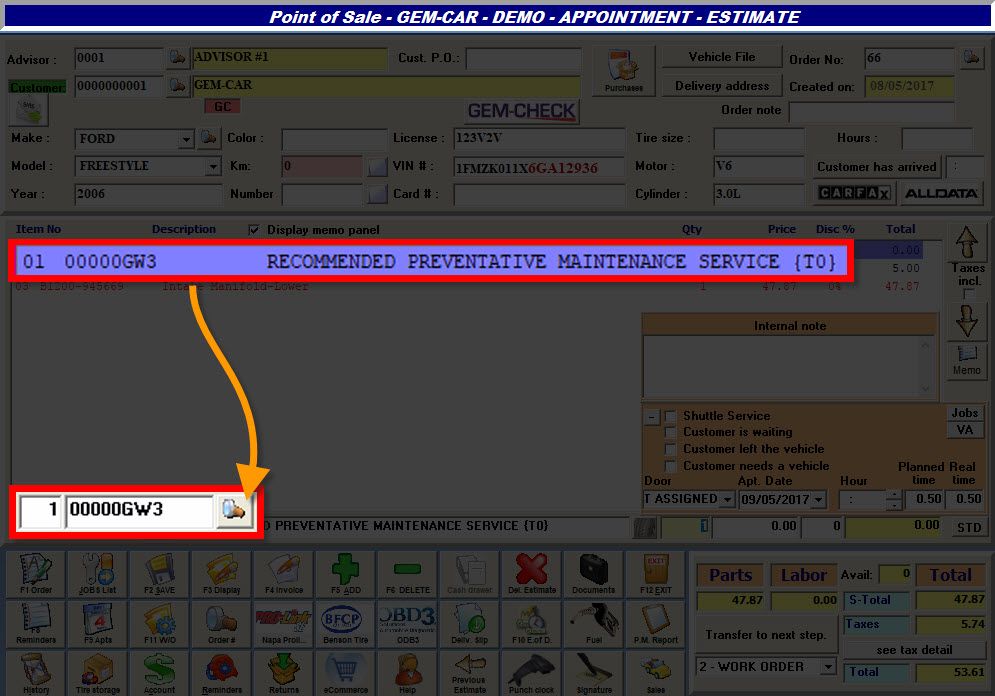
- Select the labor code,
- Click the magnifying glass {fa-search} next to the product code to open the product file,
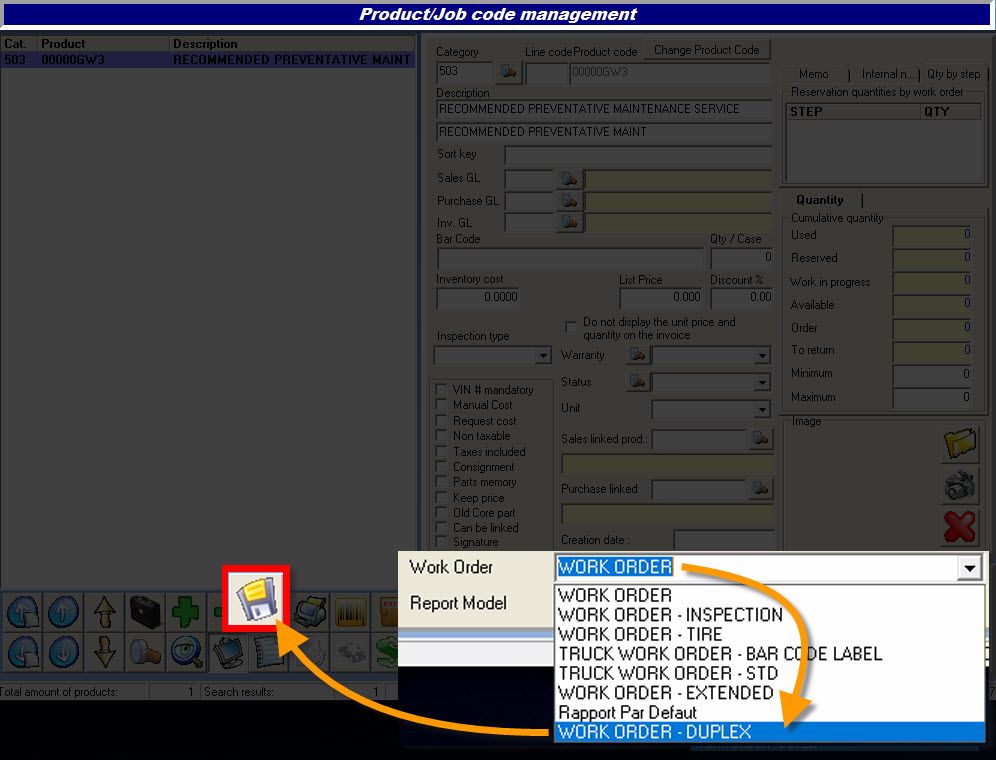
- At the bottom of the window on the right, in the "Work order" field, select the new two-sided model (ex: WORK ORDER - DUPLEX),
- Click the disk {fa-save} to save.


