- Step 1 : Return the paid invoice amount to the customer's account (in AR)
- Step 2 : Return the cashed amount to the correct account (ex: Check, MasterCard, Check, ...)
- Step 3 : Payment collection (AR) with the necessary corrections.
THIS PROCEDURE WILL NOT AFFECT YOUR TECHNICIAN PERFORMANCE AND TAXES
Step 1 - Return the paid invoice to the customer's account
View your invoice to reverse and take note:
- the amount,
- payment method
- the date
- If necessary, the number of the invoice included in the payment
Once this information is in hand, follow the instructions below:
From the Point of Sale,
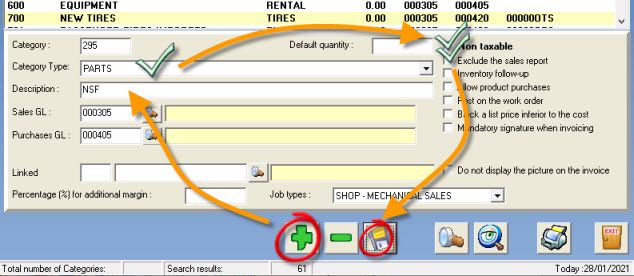
a) create the category
- Create a new part type category (ex: 295: 'NSF"),
- Configured as a PARTS TYPE
- Non-taxable,
- Exclude from sales report,
- Enter a description,
- Save,
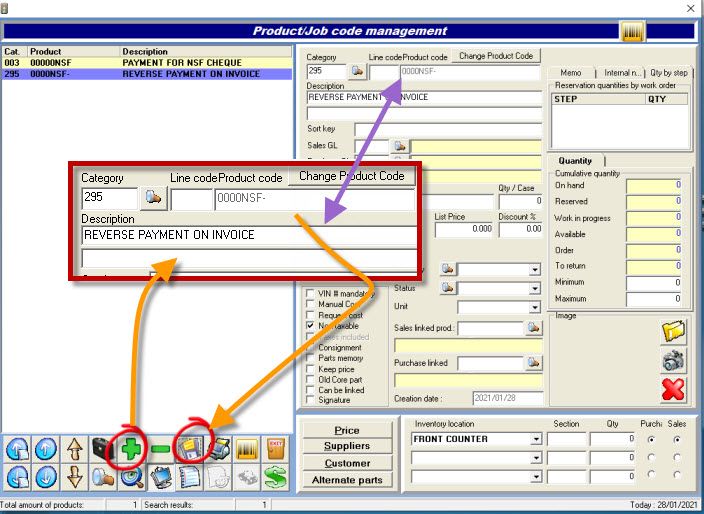
b) create the product:
- Open the inventory window (Spyglass in the line item from the grid in POS)
- Click the "+",
- Chose the category: 295,
- Enter a new code (ex: ADJUST ) and continue,
- Save.
C) Back in the POS,
- Make a new estimate for this client,
- In the product line, enter a new code (ex: ADJUST ) and continue,
- Leave the default quantity ( 1 ),
- Enter the price that corresponds to the amount of the paid invoice,
- Save.
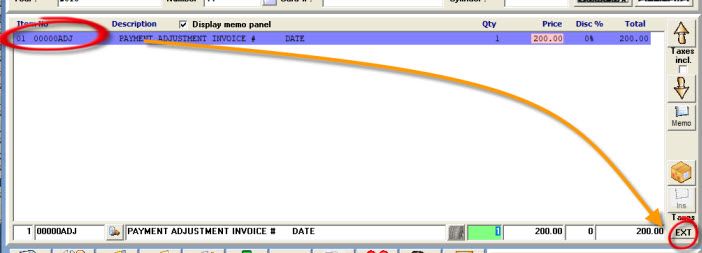
- You can verify the taxes by clicking on the product line you have just created and click on the small " EXT" button to the right of the line for adding a product,
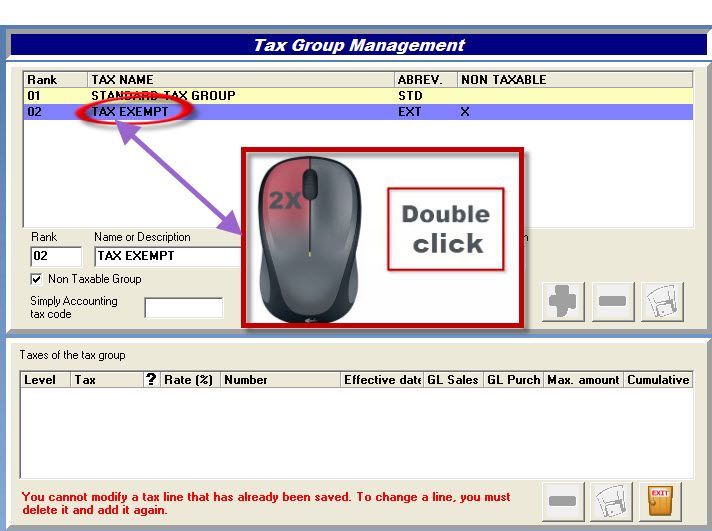
- Click twice on your " NON TAXABLE " tax group (ex: "TAX-EXEMPT"),
- Click "F4" to close the invoice,
- Change the date to the NSF date,
- Select the payment "Receivable",
- Click on the $ icon,
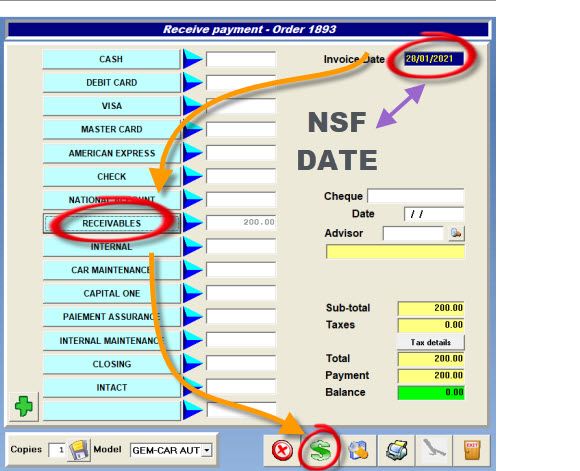
- NOTE that the date of NSF transaction is normally 5-7 days from the original transaction
Step 2 - Remove the payment received of the payment on record (Check, MasterCard)
- Repeat exactly the same procedure from the previous step, changing only:
- The description of the product (ex: RETURN TRANSACTION: CHECK invoice # 50020 ),
- The quantity of the product at -1,

- Click on F4 to close the invoice,
- Change the date to the NSF date,
- Select the payment Ex: "Check",
- Click on the $ icon,
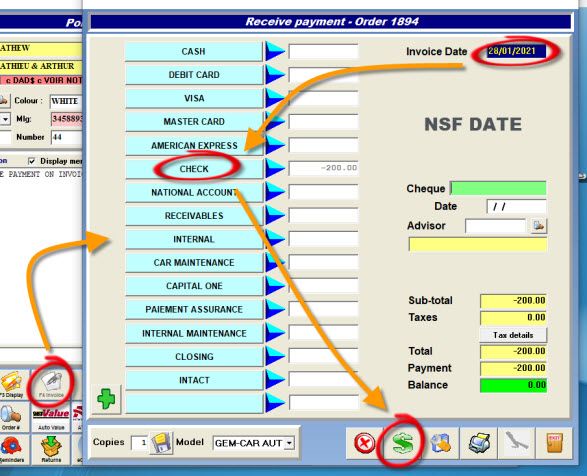
- When invoicing, enter the correct transaction date of the NSF, the same method of payment as the payment received from the customer (ex: CHECK ),
- Click on the dollar sign "$" to close the invoice without printing or click on the printer to print.
Step 3 - Apply for the payment on the account after the collected NSF is eventually received
- Create a new estimate in the name of the same client,
- Click on the green dollar sign "$" or enter your "Account Receivable" product code (ex: AR),
- Select the invoice to pay,
- Close the invoice as usual, with a memo "NSF invoice for audit trail" the current date and method of payment.
- For more detail, visit the FAQ : How to register a payment on an account receivable customer?


 Click here to ask for a free demo


