
In the main menu, go to [Configuration > General information],
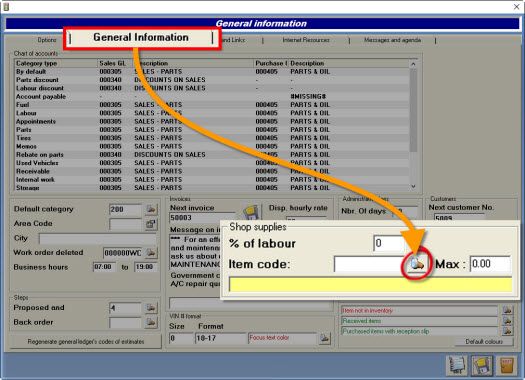
- Choose the second tab "General Information",
- In the section "Shop supplies" (bottom-right), click the spy glass to open the Inventory,
- If you already have the Shop supplies product (ex: SS), you can skip to the end of that section.
- Click the {fa-plus-square-o } to create a new product,
- Enter a Category (ex: 200), a Product code (ex: SS) and a Description (ex: SHOP SUPPLIES),
- {fa-warning } Do not select a category that a particular margin or that you already use for discounts. It has to be a unique category with the type "PARTS".
- {fa-info-circle} You can create new category for shop supplies with category type "PARTS".
- Click the disk {fa-save} to save.
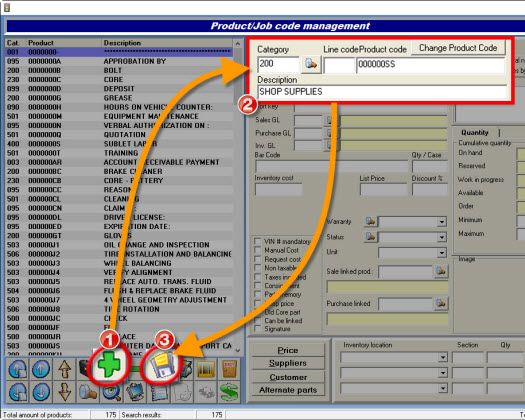
-
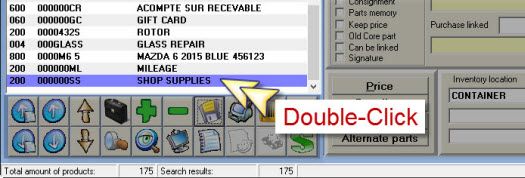
Double-click the new product (highlighted blue),
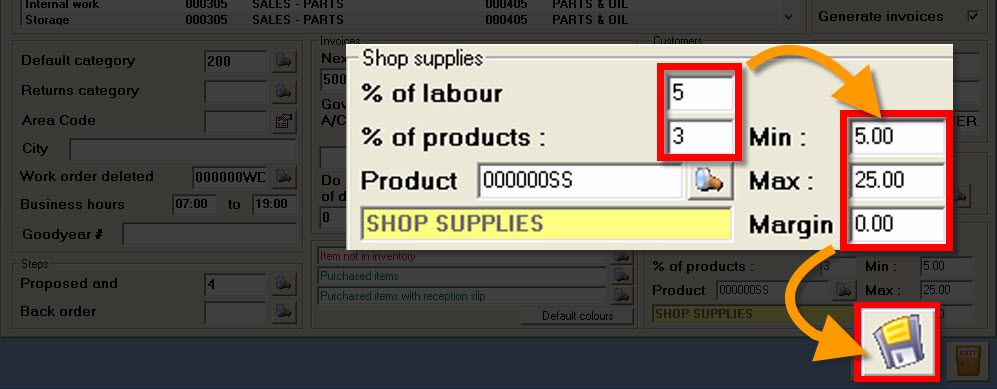
- Add a percentage % of labour,
- Add a percentage % of products,
- Add a Minimum limit for shop supplies,
- Add a Maximum limit for shop supplies,
- Add a Margin percentage on the cost for shop supplies,
- Option added to version 9.2
- Click on the disk {fa-save} to save.
In the main menu, go to [Customer Management] > [Customer management],

- Select a customer,
- Select the tab "Additional Information"
- Check the option box "Automatically add shop supplies to invoices".
- Click the disk {fa-disk} to save.
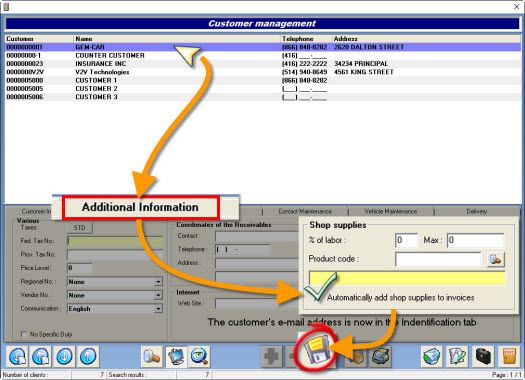
{fa-info-cricle} To activate shop supplies to all customers, contact the Support @ 1-844-909-9800
In the Point of Sale,
- Open or create an estimate/work order,
- Add the shop supplies product code (ex: SS),
- Save.

- Go to [Inventory > Product/Job code management],
- Click on the spyglass and find the job,
- Activate the option "No shop supplies",
- Click the disk {fa-save} to save.


 Click here to ask for a free demo


