

GEM-Fuel is a module to quickly sell gas on-the-go.
Requirements:
Main advantages:
- Quickly manage your fuel sales from the Point of Sale without having to quit or stop what you were doing (e.g.: buliding an estimate or work order, etc...)
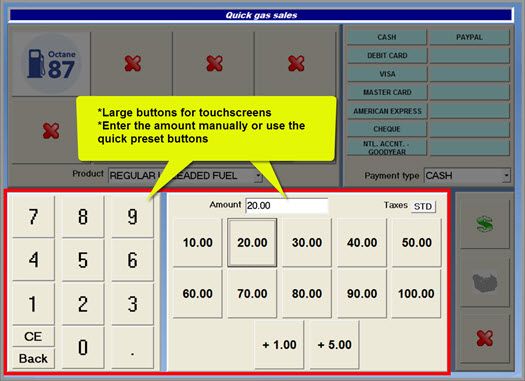
- Large numeric buttons adapted for touchscreens and tablets.
From the main menu, go to [Configuration] > [General information]:
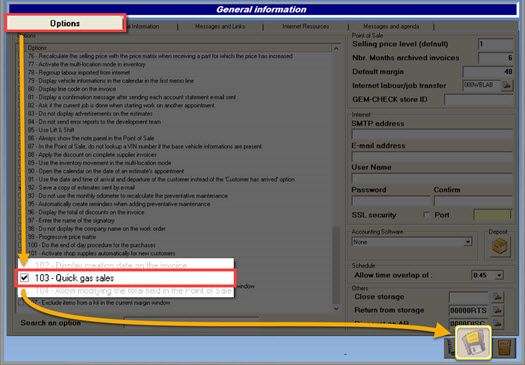
- On the first tab called "Options", check option: {fa-check-square-o } 103 - Quick gas sales,
- Check the disk to save.
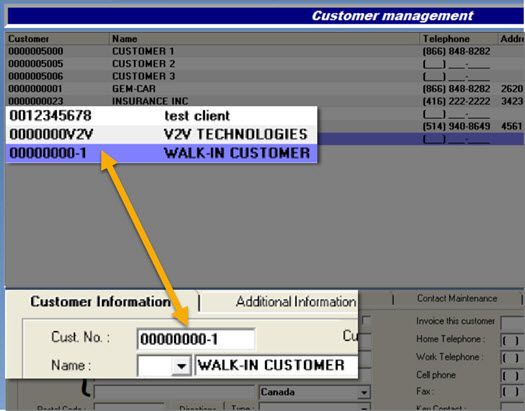
To speed up your gas sale process, GEM-CAR will use the "Walk-in customer", hence the importance to set it properly.
Make sure you have a walk-in customer in your customers list or create one in the Customer Management window. The walk-in customer is generally used to invoice counter sales, allowing you to change the customer name on-the-fly.
From the main menu, go to [Configuration] -> [General information]:
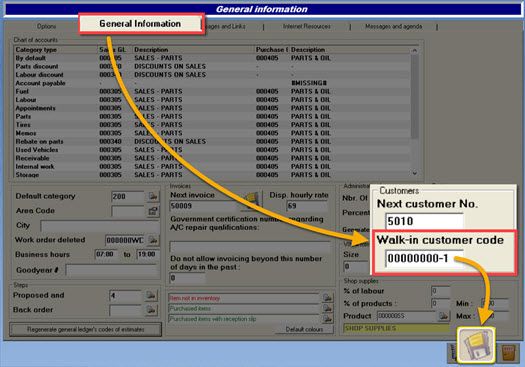
- Go to the tab [General information],
- Go to middle-right section called "Customers",
- In the "Walk-in customer code" field, type your walk-in customer code (e.g.: "-1", by default)
- Click the disk to save.
From the main menu, go to [Inventory] -> [Sales and Expense categories management]:
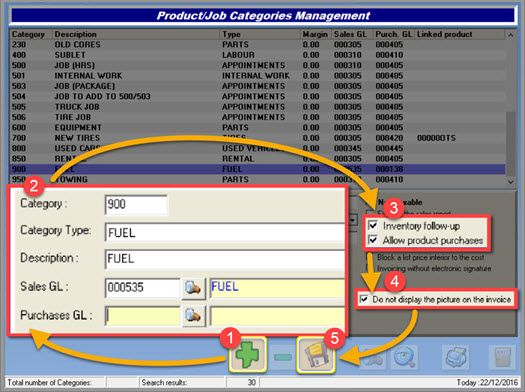
- Note: If you already have a "FUEL" category, move to the next section of this FAQ, otherwise:
- (1) Click the plus sign (+) to create a new category,
- (2) Enter a "Category number" (e.g.: 900),
- (2) In "Category Type", choose "FUEL",
- (2) Enter a "Description" (e.g.: FUEL),
- (3) On the right section, check the following options:
- Inventory follow-up,
- Allow product purchase,
- (4) Click the disk to save.
Each of these products will become selectable in the Gas Sale window.
From the main menu, go to [Inventory] > [Product/Job code management]:
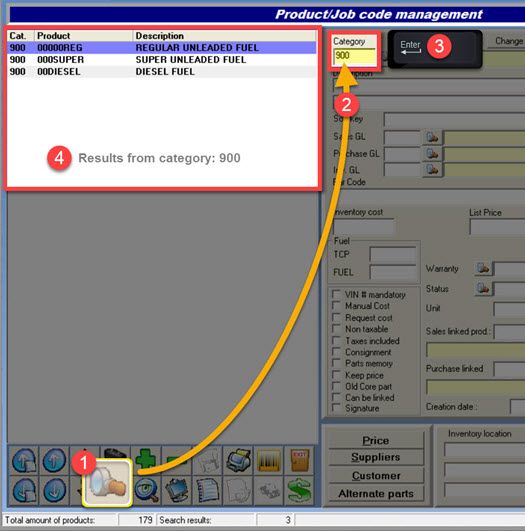
- Note: Check to see if you already have "FUEL" type products,
- (1) Click on the spy to activate "search" mode,
- (2) Enter the FUEL category number (e.g.: 900),
- (3) Hit "ENTER" to launch the search.
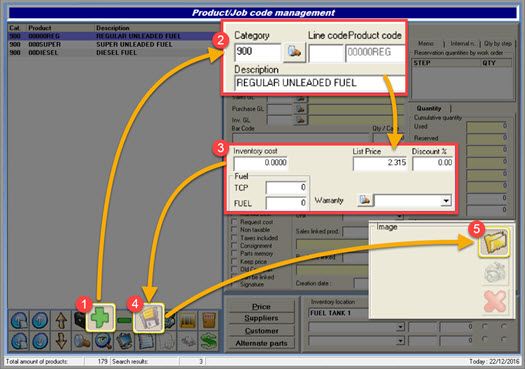
- To create or add products, follow the next steps:
- (1) Click the plus sign (+) to create a new product,
- (2) Enter the FUEL "Category number" that we created previously (e.g.: 900),
- (2) Enter a "Product code" (ou code de produit) (ex: DI, pour DIESEL),
- (2) Enter a "Description" (e.g.: REGULAR UNLEADED FUEL),
- (3) Enter "Inventory Cost" and "List Price",
- (3) In the "Fuel" section, enter your "TCP" and "FUEL",
- (4) Click the disk to save,
- (5) Click the folder icon the the "Image" section to set a picture to the item.
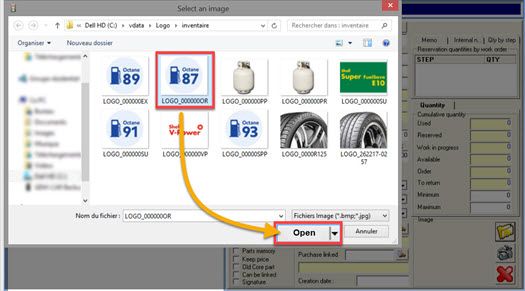
- Select an image,
- Click "Open",
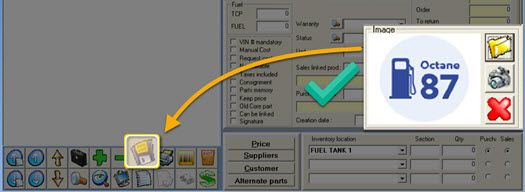
- Make sure the image is displayed,
- Click the disk to save.
- Note: Repeat the same process for every similar FUEL product.
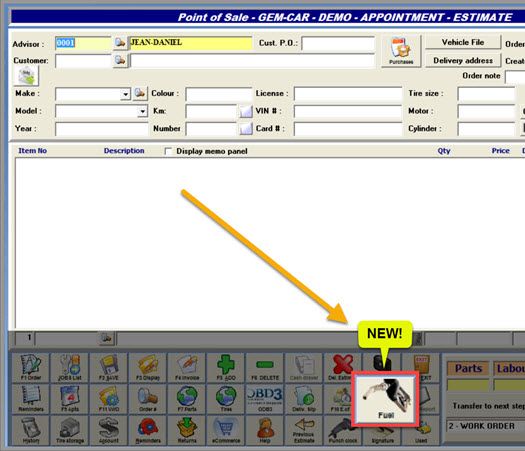
From the main menu, go to Point of Sale:
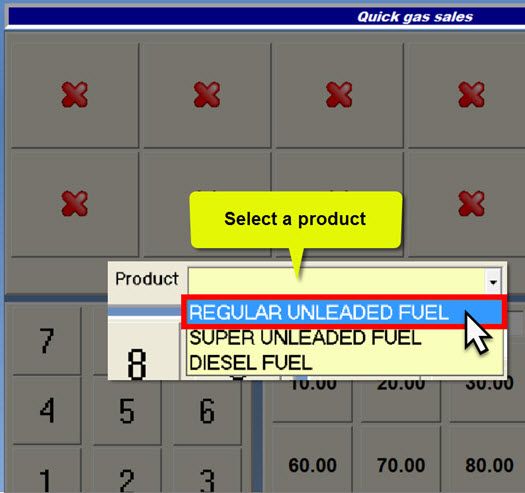
- In the "Product" field, select a product to assign to a button,
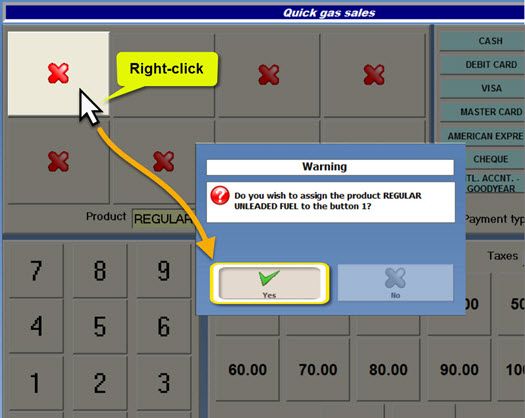
- Right-click the button where you want to assign your selected product,
- Click "Yes" to confirm the action.
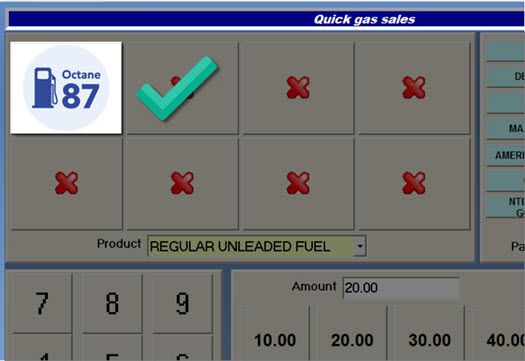
To remove a product from a button,
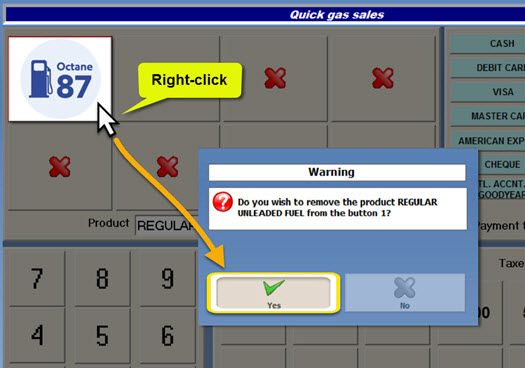
- Right-click the button,
- Click "Yes" to confirm that you want to remove the product to that button.
Whenever you are in Point of Sale, even if you are already working on another customer, you can still click the Quick Gas Sales button to sell gas to a Walk-In Customer.

- Click on the fuel gun icon,
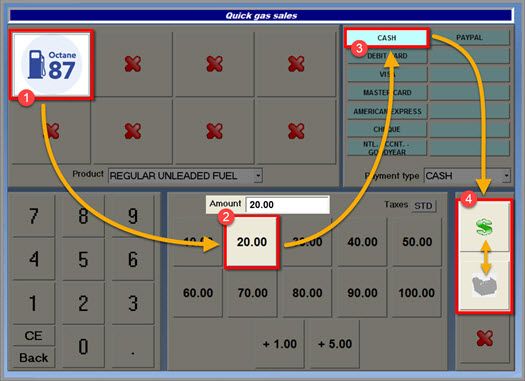
- (1) Click the product sold to the customer,
- (2) Click the amount sold or enter it manually in the "Amount" field,
- (3) Click the payment method used,
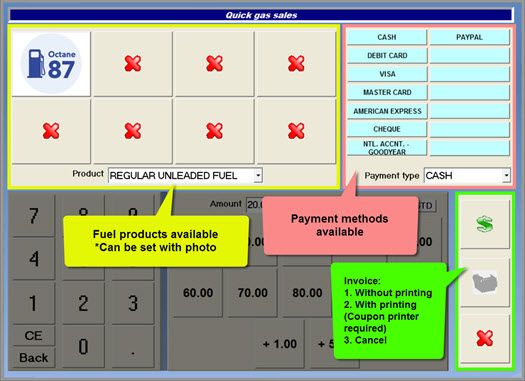
- (4) Click the green dollar sign to invoice without printing.
- (4) or Click the coupon printer to invoice with printing,
- If you don't have a coupon printer, click here to order.
- If you have one, contact the support @ 1 (866) 848-8282 to guide you.




 Click here to ask for a free demo


