Click here to ask for a free demo


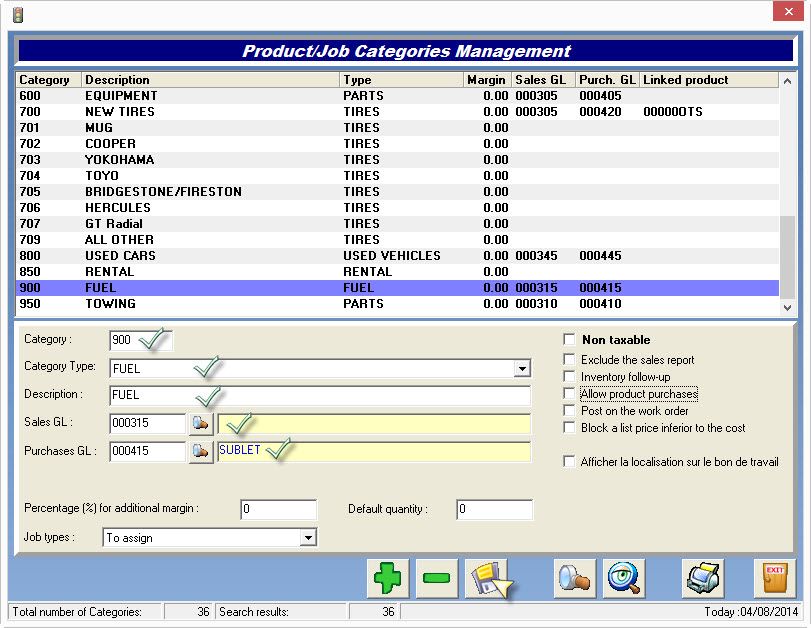
Step 1: Create a Fuel category in the Inventory module
- Go to "Inventory Management" / "Product/Job code management",
- Click on the spyglass right next to the "Category field",
- Click on the "+" sign,
- In the Category number field, enter 900,
- In the Description field, enter FUEL SALES,
- Check applicable sales tax fields,
- Do not check any other options ,
- Click Save and Exit.
Step 2 : Product
- Create all product code using the you "Fuel category",
- DO NOT CHECK: Tax included,
- TAF and TCP field should be in cents/liter or gallon: they will be included in the note field,
- Click Save and Exit.
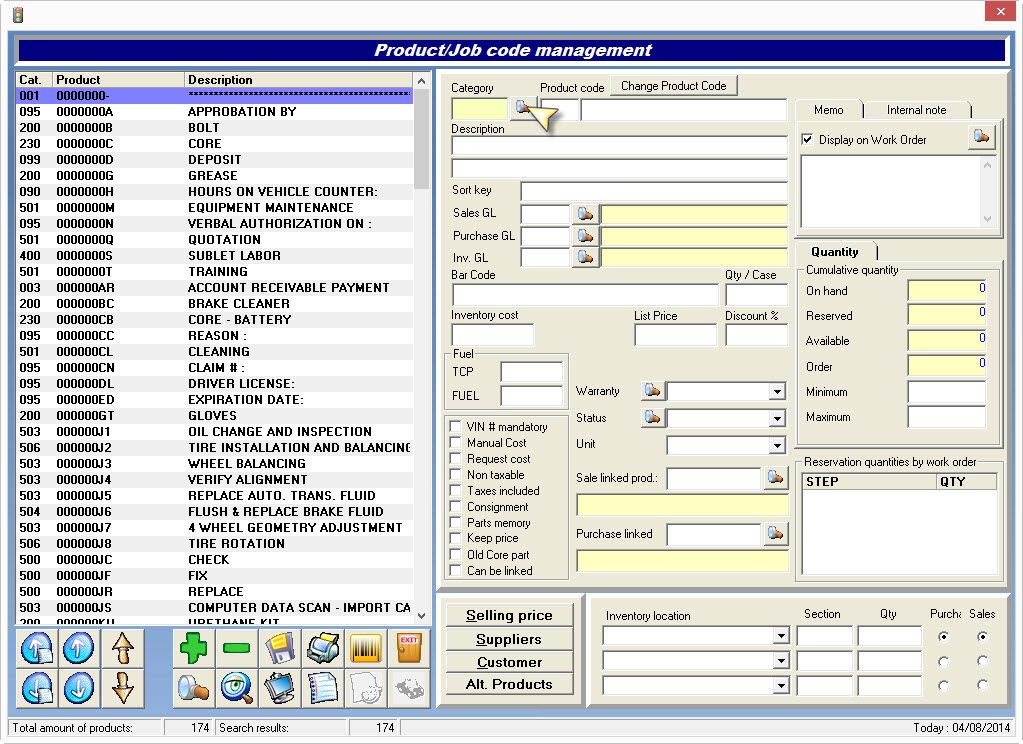
NOTE: using a "fuel product" will generate a product with taxes included: the taxes will be rounded up by 1 penny sometimes to match complicated calculation
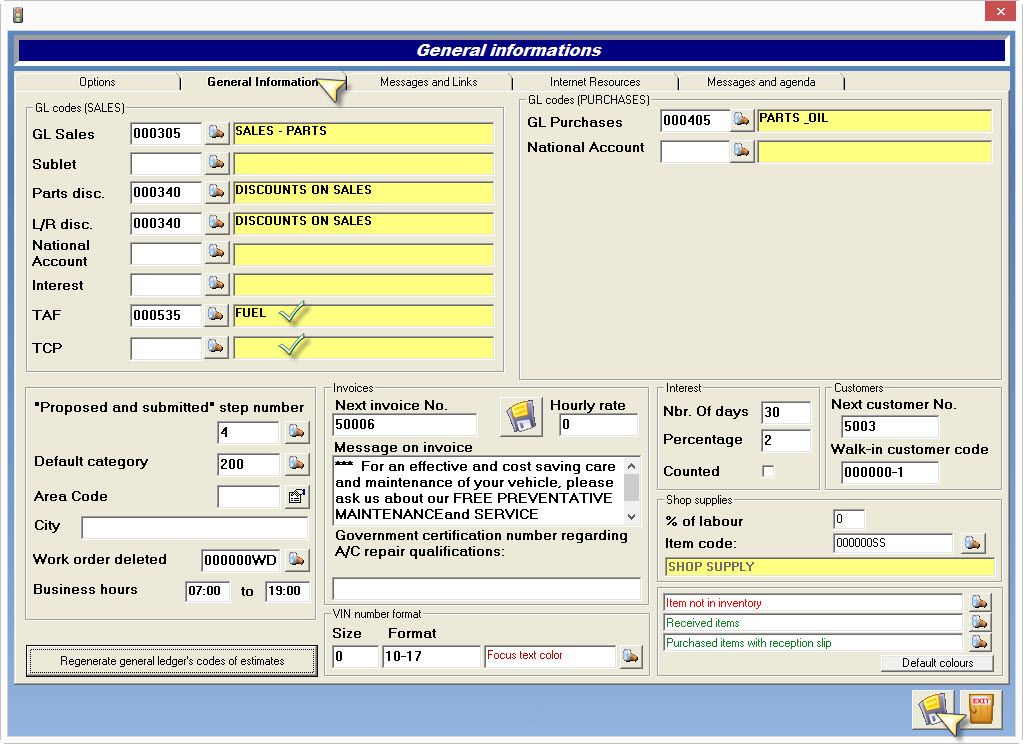
Step 3 : Configuration
- Go to "Configuration" / "General information",
- Go to the "General information" tab,
- In the TAF and TCP fields enter the applicable GL accounts,
- Save and exit.